Migrating from Tasmota
Migrating from previous Tasmota setups is very easy. You just need to have ESPHome create a binary for you and then upload that in the Tasmota web interface.
CAUTION
When migrating via OTA on ESP32, from Tasmota v12 or higher (with safeboot partition) it is required to add the
option allow_partition_access: true to your config on the first ESPHome firmware you upload to the device.
Failing to do so will soft-brick your device by making OTA updates impossible!
Writing a configuration
Section titled “Writing a configuration”First create a configuration for your device.
ESP32 devices
Section titled “ESP32 devices”Check the Tasmota image variant on your device, as it tells you which type of ESP32 you have. It is usually displayed at the bottom right of the Tasmota web interface.
solo1: Single-core ESP32tasmota32: Dual-core ESP32tasmota32xx: Different ESP32 variant wherexxcan be for examplec3,c6,s2,s3. You need to pick the right variant when creating your ESPHome config.
If you have a single-core ESP32 device you need to compile ESPHome with single-core support or it will fail to boot. Add the following to your config for single-core devices:
esp32: ... framework: type: esp-idf sdkconfig_options: CONFIG_FREERTOS_UNICORE: yImportant: When migrating from Tasmota v12 or higher, make sure to add allow_partition_access: true to the ota section of the config:
ota: - platform: esphome allow_partition_access: trueGetting the Binary
Section titled “Getting the Binary”Generate and download the firmware image:
Using the Home Assistant app/dashboard
Section titled “Using the Home Assistant app/dashboard”From the card of your device: open the three dots menu and select Install option.

A new dialog will open. Click on Manual download option.
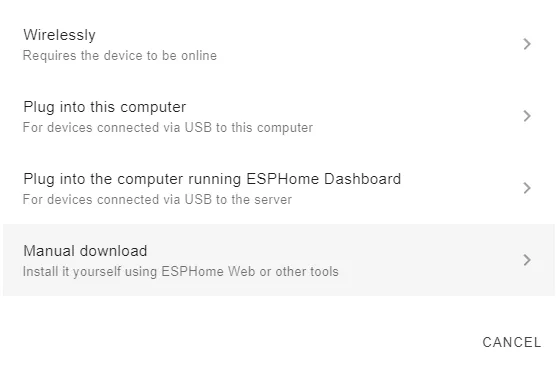
Finally, choose factory format (formerly "modern format") in the last dialog.
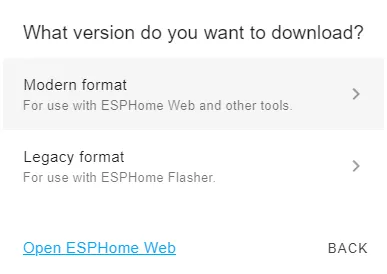
The build process of the firmware will start and the image will be automatically downloaded after its completion.
Using the command line
Section titled “Using the command line”From your configuration files folder, run
esphome compile <MY_DEVICE>.yamlreplacing <MY_DEVICE>.yaml with your configuration file and navigate to the
<MY_DEVICE>/.pioenvs/<MY_DEVICE>/ folder.
There you will find a firmware.bin file. This is the binary that you will upload.
Uploading the Binary
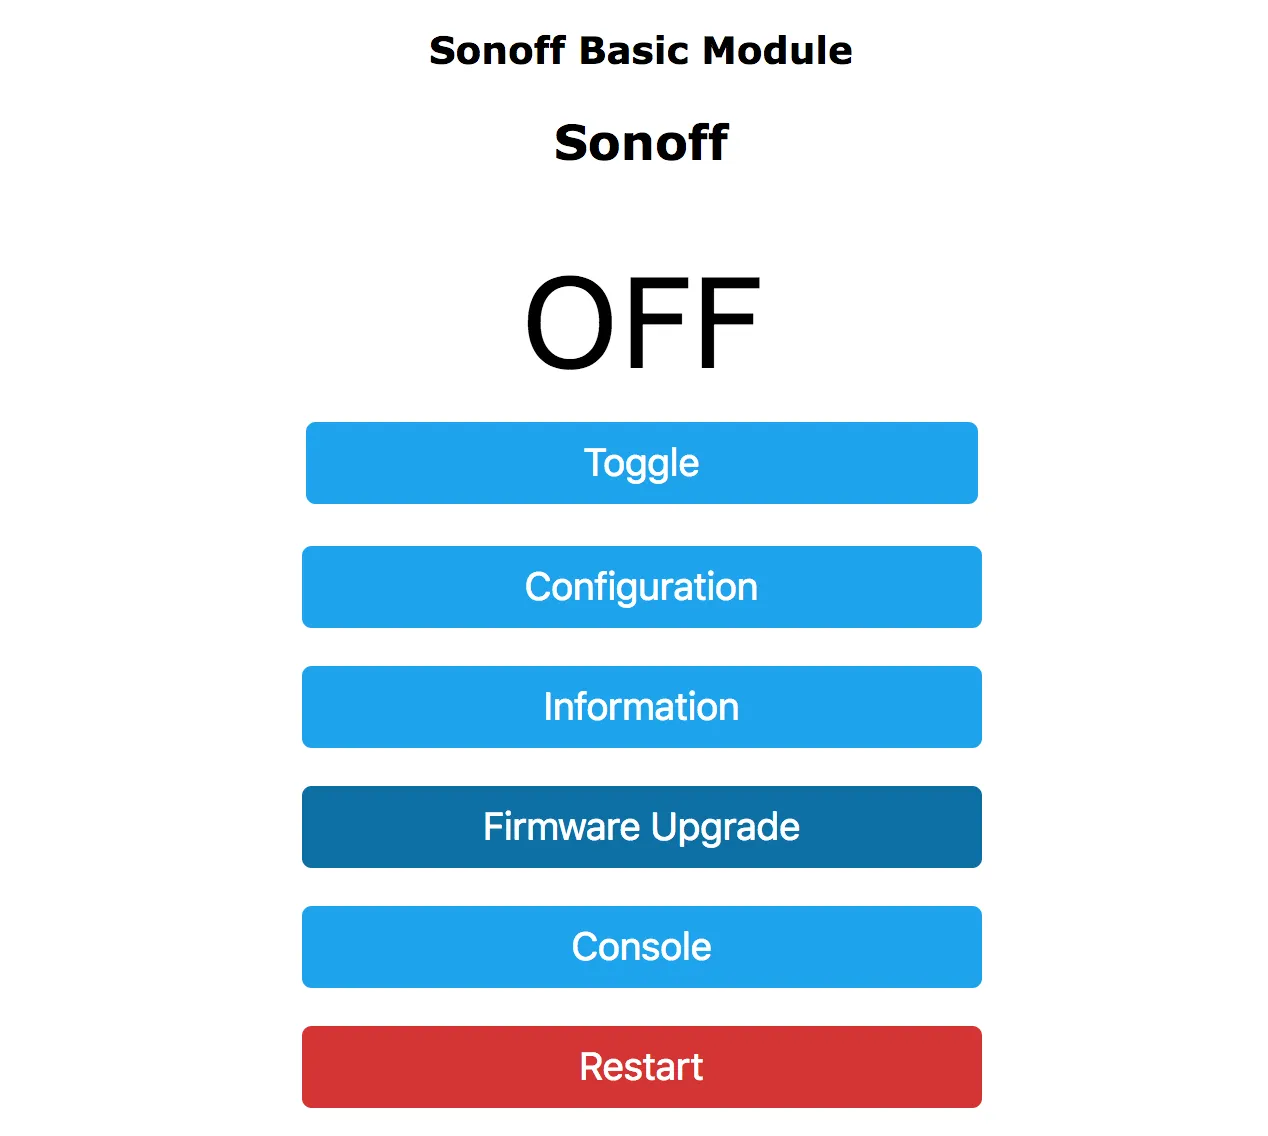
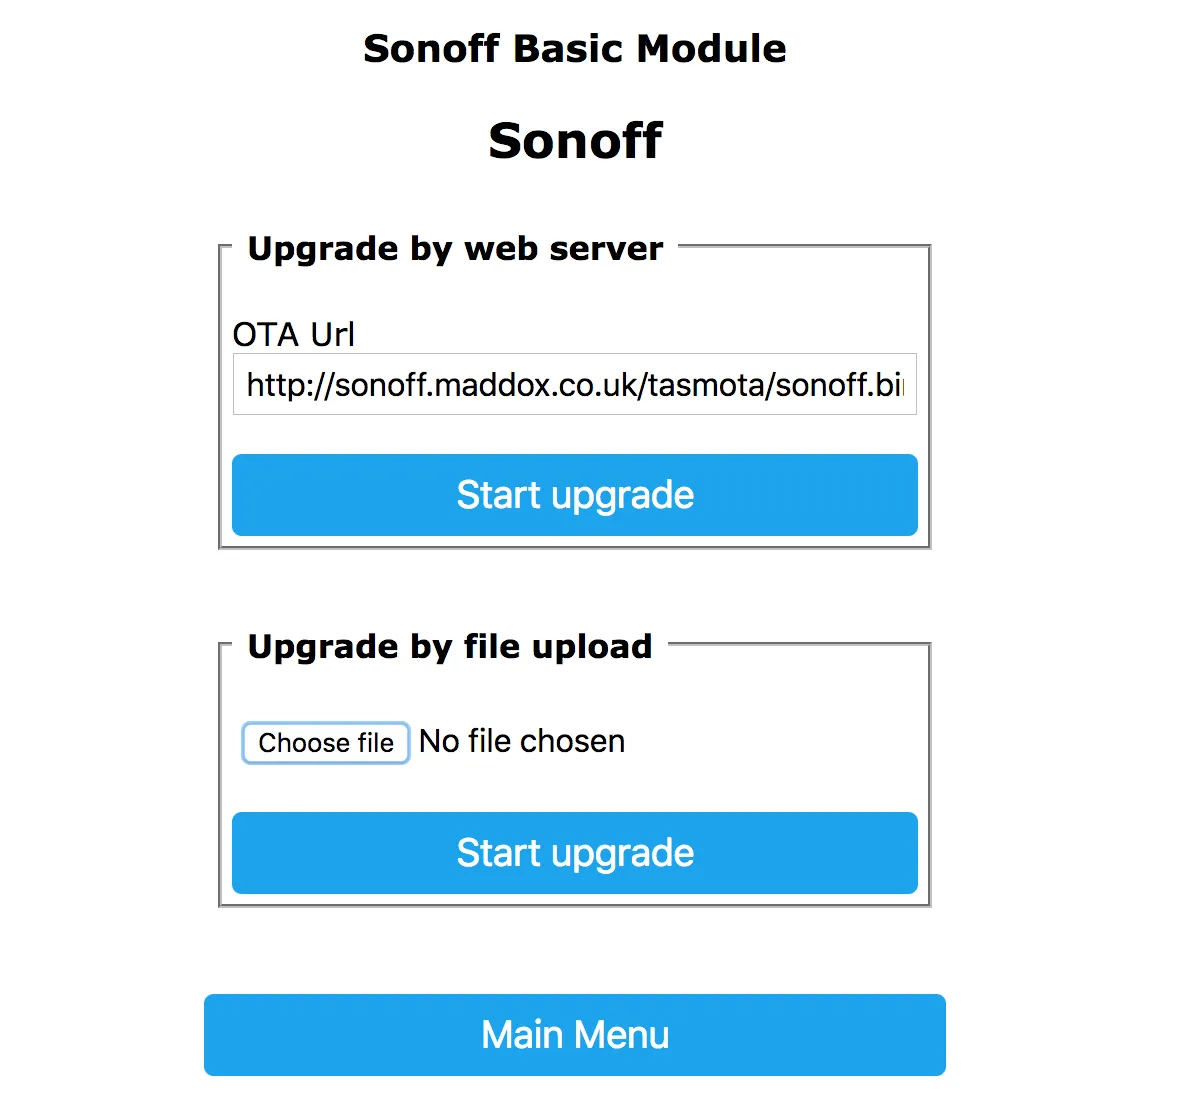
Section titled “Uploading the Binary”To upload the binary, navigate to the Tasmota web interface and enter the "Firmware Upgrade" section.
In the "Upgrade by file upload" section, choose the binary you previously downloaded
If everything succeeds, you will see an "Upload Successful" message and ESPHome will connect to the WiFi network configured in your .yaml file. 🎉

Happy Hacking!
NOTE
When using the esp8266_pwm output platform and switching from Tasmota, you need to power-cycle the device once. After that the dimming functionality will work as usual and no more power cycles are required.
About image size and ESP8266
Section titled “About image size and ESP8266”ESP8266 has very limited storage space. Trying to upload a large image will cause the upgrade process to fail.
Tasmota 8.2 introduced upgrading using gzipped binaries which are smaller in size and make the upgrade process easier.
-
If you are using Tasmota 8.2 or later (recommended) you probably will want to compress the firmware generated from ESPHome with
gzipbefore uploading it. -
If you are using any version older than 8.2: first upload
tasmota-minimal.binfrom Tasmota repository. Then upload the firmware generated from ESPHome. -
Alternatively, first upgrade Tasmota to the latest version. Then use the first (gzip, recommended) method.
If you are using Tasmota 7.2+ it may be necessary to run the command
SetOption78 1in the Tasmota console and restart your device to be able to upgrade to esphome.
Automated migration from console
Section titled “Automated migration from console”You may also use Tasmota console to invoke the upgrade with just two commands:
OtaUrl http://<MY-ESPHOME:6052>/download.bin?configuration=<MY_DEVICE>.yaml&file=firmware.bin&compressed=1Upgrade 1replacing http://<MY-ESPHOME:6052>/ with the host and port of your ESPHome installation and <MY_DEVICE>.yaml
with your device configuration file name.
If you need to use the uncompressed image for any reason, just remove &compressed=1 from the above url.
ESP32 Partition table migration
Section titled “ESP32 Partition table migration”If you migrated an ESP32 device from Tasmota v12 or later using the safeboot-based layout, you need to update the partition table after uploading ESPHome. Regular OTA updates are impossible until this step is completed. Older or non-safeboot Tasmota layouts may not require this step.
CAUTION
There is a risk of bricking the device if the power is interrupted or the ESP is reset during a partition table update, requiring serial flashing to repair it. Make sure you have a stable power supply. The update is usually completed within less than 15 seconds after running the esphome upload command.
IMPORTANT
Migrating from Tasmota to ESPHome changes the location of the NVS partition, invalidating all configuration data stored in non-volatile memory. If you used Captive Portal or Improv to configure your WiFi credentials you need to do that again before continuing to the next step. This only happens once during the migration: after the first successful esphome upload --partition-table command for the direct method and indirect methods A and B, or after the final esphome upload --partition-table command for indirect method C.
NOTE
Picking a method whose size limit is too small for your running app does not brick the device. The device verifies the new partition table before writing anything to flash and rejects the upload with an error if the running app would not fit. You can safely retry with the next-larger method. Only power loss or a reset during a partition table update that has already passed verification can leave the device unable to boot.
Open the ESPHome logs. In the config section of the logs, check the Used size of the running app. This tells you which method to use. You only have to complete the steps for one of the methods below.
Direct Method
Section titled “Direct Method”Downloads:
Requirement: The Used size must be 851968 bytes or less. Run the following command in a command line:
esphome upload --partition-table --file partitions_esphome.bin <MY_DEVICE>.yamlIndirect Method A
Section titled “Indirect Method A”Downloads:
Requirement: The Used size must be 983040 bytes or less. Run the following commands in a command line:
esphome upload --partition-table --file partitions_tasmota_migration_a.bin <MY_DEVICE>.yamlesphome upload --partition-table --file partitions_esphome.bin <MY_DEVICE>.yamlIndirect Method B
Section titled “Indirect Method B”Downloads:
Requirement: The Used size must be 1376256 bytes or less. Run the following commands in a command line:
esphome upload --partition-table --file partitions_tasmota_migration_b1.bin <MY_DEVICE>.yamlesphome upload --partition-table --file partitions_tasmota_migration_b2.bin <MY_DEVICE>.yamlesphome upload --partition-table --file partitions_esphome.bin <MY_DEVICE>.yamlIndirect Method C
Section titled “Indirect Method C”Downloads:
Requirement: The Used size can be any size but you have to install a regular OTA update with a size of 851968 bytes or less during the process. Run the following command in a command line:
esphome upload --partition-table --file partitions_tasmota_migration_c.bin <MY_DEVICE>.yamlInstall the OTA app update now: To reach the target size of 851968 bytes or less, you probably have to remove all components except esp32, esphome, logger, api, ota and wifi from your config. Compile and install ESPHome via OTA. Then, run the following command in a command line:
esphome upload --partition-table --file partitions_esphome.bin <MY_DEVICE>.yamlAfter completing the partition table migration
Section titled “After completing the partition table migration”The ESP will reboot itself after completing each partition table update. The process is complete after successful installation of the partitions_esphome.bin partition table. Verify that the partition table in the ESPHome logs looks like this:
Partition table: Name Type Subtype Address Size otadata 0x1 0x0 0x9000 0x2000 phy_init 0x1 0x1 0xB000 0x1000 app0 0x0 0x10 0x10000 0x1C0000 app1 0x0 0x11 0x1D0000 0x1C0000 nvs 0x1 0x2 0x390000 0x70000You can now remove the line allow_partition_access: true from your config, add more components and install ESPHome updates via OTA.